https://blogs.office.com/2016/11/29/merging-intelligence-with-productivity-a-demo-tour-of-recent-office-app-updates/#.WD3SNoEb9wU
https://blogs.office.com/2016/11/29/merging-intelligence-with-productivity-a-demo-tour-of-recent-office-app-updates/#.WD3SNoEb9wU
https://blogs.office.com/2016/11/29/new-to-office-365-in-november-new-collaboration-capabilities-and-more/#.WD3SW35xYpY

Groups in Office 365 are intended to be created and managed by admin and end users. If you, the global administrator, need to perform bulk operations, configure global settings, or want to monitor Group activity from the command line, you can use Windows PowerShell and the following cmdlets to accomplish those tasks. Check out Learn more about groups for more information about groups in Office 365.
https://blogs.office.com/2016/11/28/a-deeper-look-at-skype-for-business-integration-with-ios-callkit/#.WDyfvdiJkLg
NOTE: You may also be able share files with external users (people not on your network) by inviting them as “Guests,” or by creating and posting guest links. For details, see Share sites or documents with people outside your organization.
You can share a link to a file that others can also share by using Get a link. Get a link is available only for individual files, but it’s the easiest way to share files with everyone in your organization or to share with people externally (as long as external sharing is enabled for your sites).
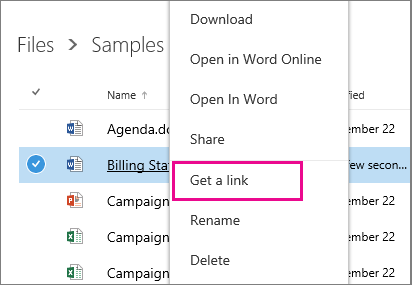
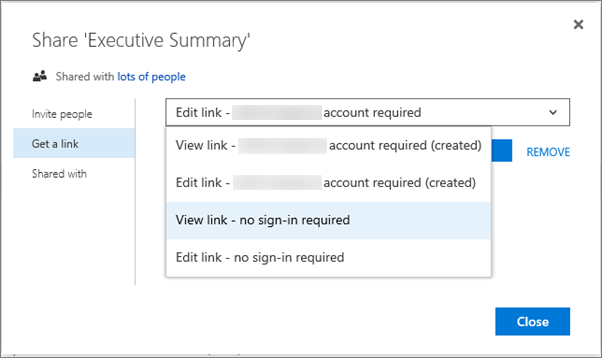 Links for internal sharing:
Guest links:
NOTES: If you see only a restricted link option instead of the options shown here, sharing links may be disabled or you may not have permission to use them. For information about how to enable sharing, see Video: Share a site without access request.
If guest access is disabled, you’ll see only account required options.
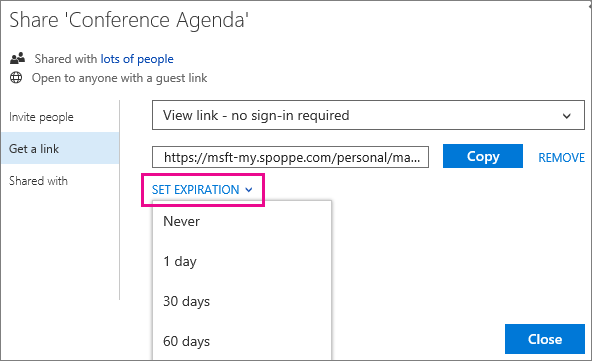
NOTES:
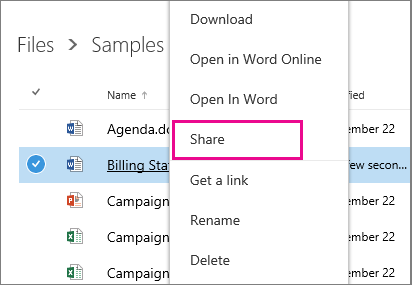
To share folders or to share files when Get a link isn’t available, you can invite people.
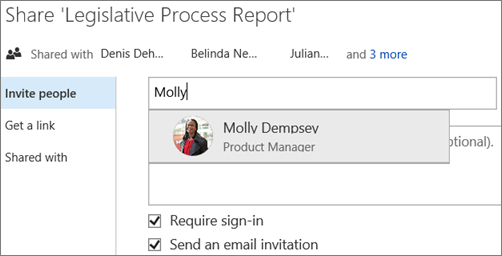
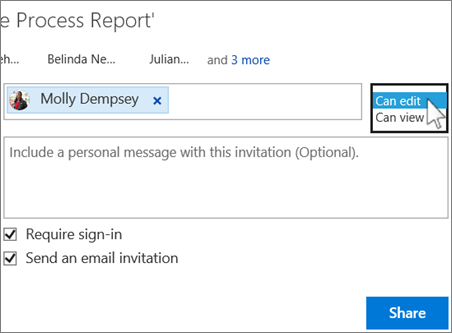
NOTE: If guest access is disabled, you may not see the Require sign-in option.
For recommendations on where to store files in Office 365 and how to set things up, see Set up Office 365 file storage and sharing.
To share multiple files with a selection of people, you have a couple of options:
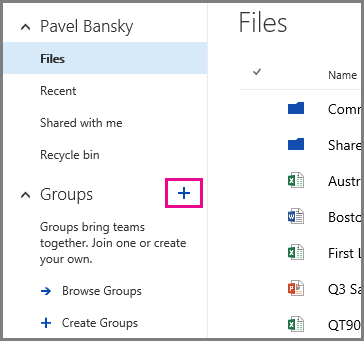
Create a group (if you’re in Office 365 and Groups are enabled)
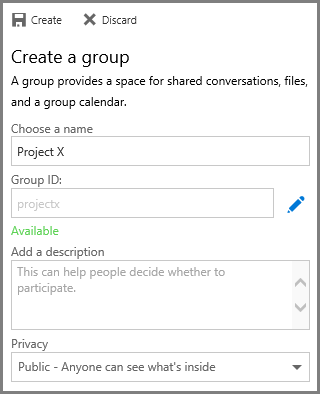
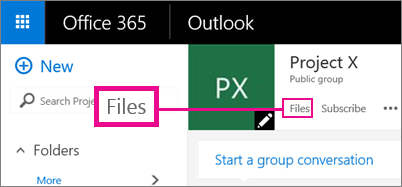
Create a folder and place files in that folder as you create them
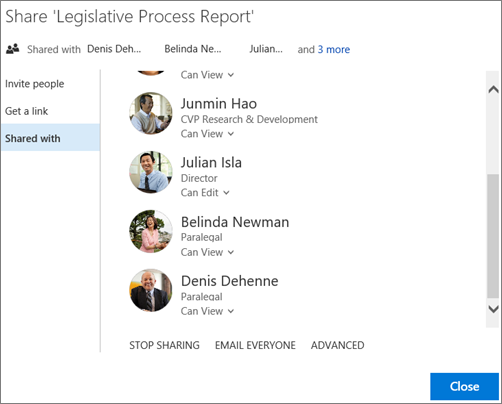
TIPS: If the library you’re working in has a Sharing column, you can select the people icon to open the Share dialog box.

To make a file or folder private again, you can stop sharing it.

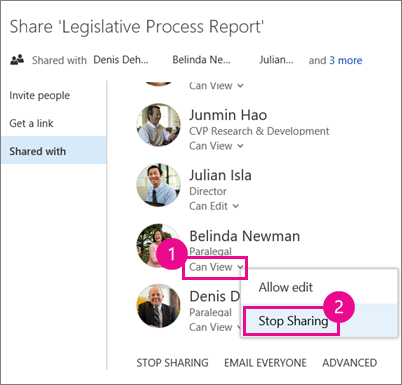
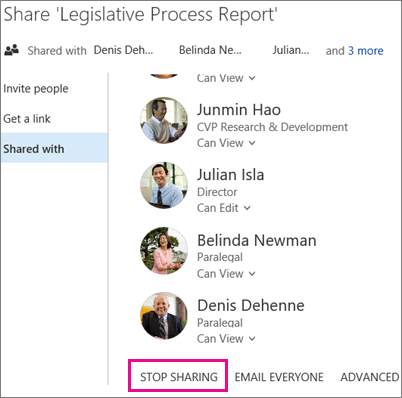
NOTE: The STOP SHARING link that removes all users at once is not available for folders. To quickly stop sharing a folder with many users or groups, try this: Click ADVANCED, use the check boxes to select the users or groups you want to remove, and then click Remove User Permissions.
In OneDrive for Business, there are more ways to share a file with everyone:
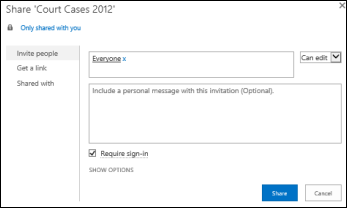
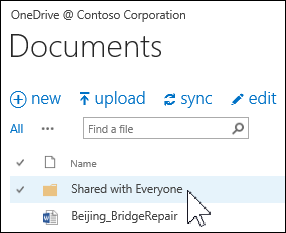
NOTE: You may already have a Shared with Everyone folder that was provisioned for you.
The Share dialog box lets you select Everyone except external users. If your organization allows external sharing, sharing with “Everyone” includes external users: people outside of your organization who have previously been invited to share files as guests, either by you or by others in your organization.
If you have a Shared with Everyone folder that was provisioned for you, everyone gets permission to edit documents that you put in the Shared with Everyone folder, unless you change the permission setting or unless your OneDrive for Business was created before June 2014. If your OneDrive for Businesswas created before that date, the Shared with Everyone folder started with View-only permissions. You can change the permission setting any time by following the instructions for sharing a folder earlier in this article.
Files you share with everyone don’t appear in their Shared with Me view in OneDrive for Business. Why not? Consider that depending on the size of your organization, there might be hundreds if not thousands of files that are shared with everyone. Also, you may not want to send a share invitation email to everyone in your organization.
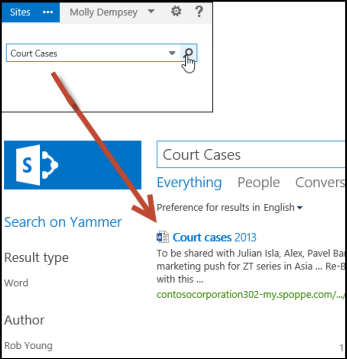
Instead, people can find these files by:
 Copy and paste the URL into an email addressed to specific people you want to notify.
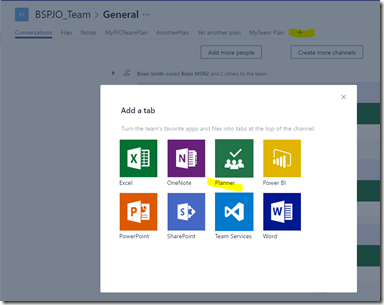
https://blogs.msdn.microsoft.com/brismith/2016/11/17/microsoft-teams-and-microsoft-planner-what-to-expect/
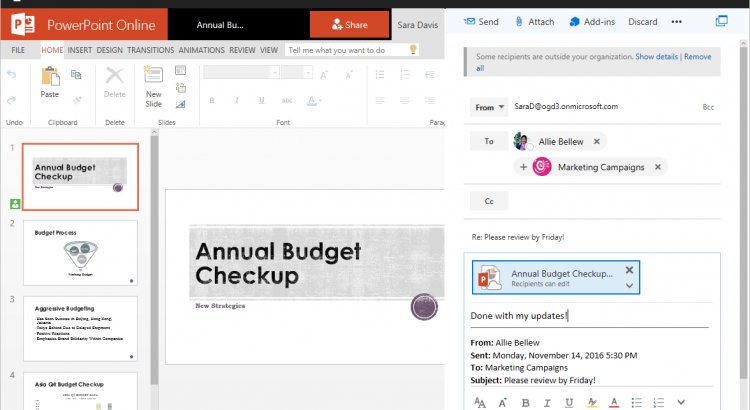
https://blogs.office.com/2016/11/17/introducing-a-new-file-experience-for-groups-in-outlook-on-the-web/
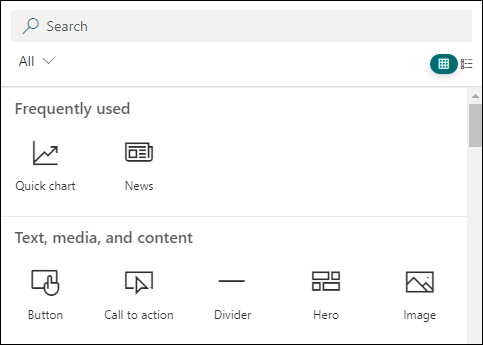
Here are the web parts you can use and their descriptions. Click the one you are interested in for more information on how to use it.
NOTES:
Use the Text web part to add paragraphs to your page. Standard formatting options like styles, bullets, indentations, highlighting, and links are available.

Use this web part to dynamically display content based on content type, filtering, or a search string. You can also set the scope of the search to a site or site collection sort the results. Here’s how:
 and select your options.
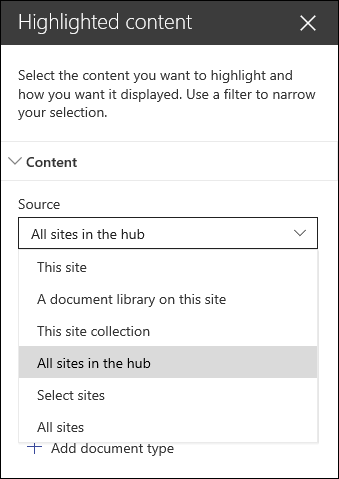
This web part automatically shows recent activity on your site, such as files uploaded, edits made, lists and libraries created, and so on. Just add the web part, and the latest activity is pulled in automatically.
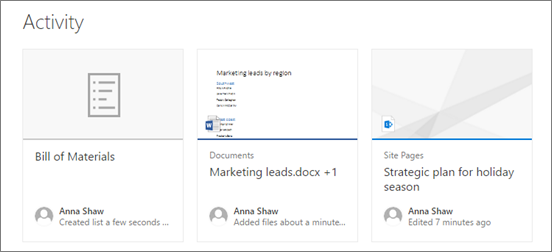
Use this to insert an Excel, Word, or PowerPoint, or .PDF document on the page. Users will see the starting page of the document in a frame, and can scroll through the pages or even download the document. Here’s an example of a PowerPoint presentation on a page:
To add a document to your page, do this:
NOTE: Users can click  to see options for the document including Download a Copy, Print to PDF, and Embed code (to see the code used to embed the document on the page).
Click the edit button  to specify settings for the document.
Use this to insert an image on the page, either from your site or your hard drive.

Use this to display a video right on the page from your organization’s Office 365 Video portal.
You can display content on your page from other sites like Bing maps and YouTube videos. Depending on the site, you can either use the site’s address or embed code that the site provides. For more information, see Add content to your page using the Embed web part.

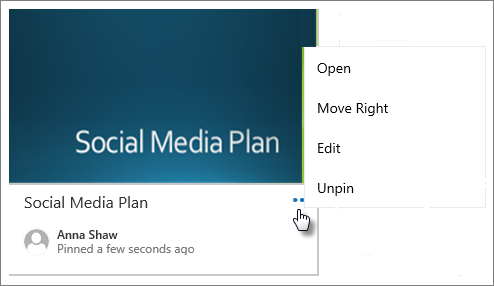
You can “pin” items to your page for easy access.
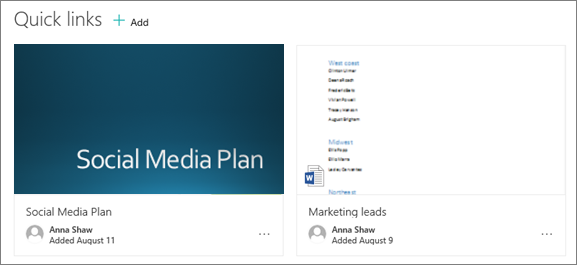 To do this:
You can open the pinned item, move it to change the order of items shown, edit the link or title, or unpin by clicking the ellipses (…) at the bottom right of each item.
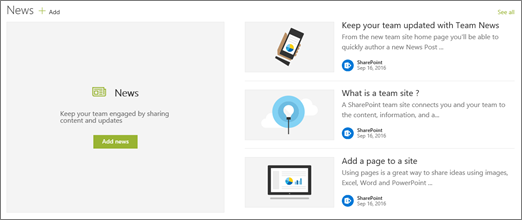
If you removed the News from your Group team site page, you can add it back. Or, you can add it to a different page. To do this, you can use the News headlines or News list web parts.

To add a simple list of news stories without the large image space on the left, select News list.
NOTE: For more information on how to work with the News features, see Keep your team updated with News on your Group team site.
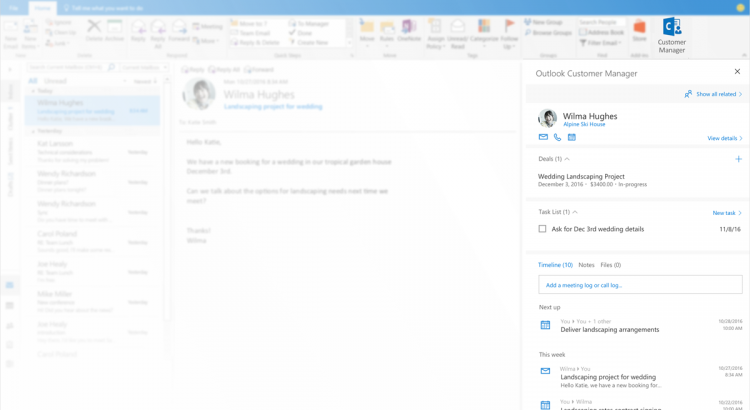
https://blogs.office.com/2016/11/14/introducing-outlook-customer-manager-relationships-made-easy-for-small-businesses/
https://www.youtube.com/watch?v=TK67_BKAzdY
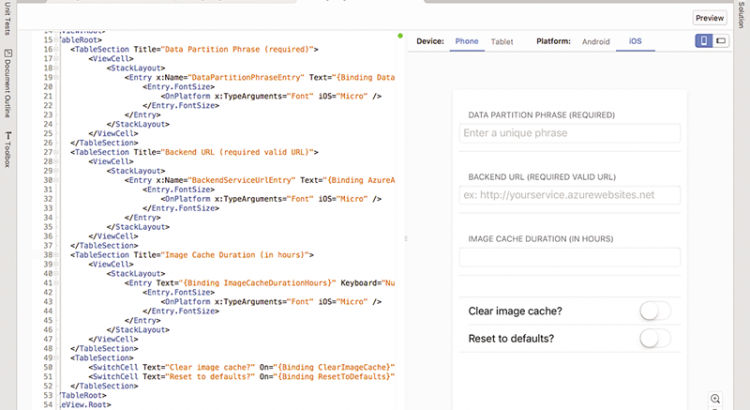
Source: https://techcrunch.com/2016/11/14/microsoft-announces-visual-studio-for-mac-will-launch-in-november/
Fans of cross-platform coding will be happy to know that Visual Studio, a “a true mobile-first, cloud-first development tool for .NET and C#,” will arrive for Mac during the Connect() conference in November. The move places Microsoft’s IDE on Macs. The IDE follows Visual Studio Code, Microsoft’s code editor, to OS X.
Why is Microsoft seemingly abandoning the quest for Windows hegemony? The writing is one the wall: cloud computing is there future and tools like AWS and Azure are quickly replacing the local server. Microsoft is losing out to tools like Docker and Heroku on the web and it’s only a matter of time before coders are more comfortable with their MacBooks and VIM than with Windows.
“They make their money off Azure and other services. In other words, they are making their money mainly off of developers now and its in their best interest to get on the good side of devs which is why they suddenly have a vested interest in open sourcing tools and helping Mac/Linux,” wrote Hacker News user BoysenberryPi.
The IDE is very similar to the one found on Windows. In fact, that is presumably the point. By making it easy for OS X users to switch back and forth between platforms Microsoft is able ensure coders can quickly become desktop agnostic or, barring that, give Windows a try again. From the release:
You can read more about the platform here and prepare yourself for a little C# coding with Visual Studio Code.