https://mspoweruser.com/onedrive-ios-app-updated-with-office-file-previewers-office-lens-features-and-more/
Download the app here from App Store and give it a try.
https://mspoweruser.com/onedrive-ios-app-updated-with-office-file-previewers-office-lens-features-and-more/
Download the app here from App Store and give it a try.
http://www.techradar.com/news/microsofts-office-365-is-twice-as-popular-as-googles-g-suite
Bitglass also looked at which countries in Europe had the biggest percentage of companies that had adopted cloud productivity apps, with France top of the rankings on 82%, followed by the Netherlands on 78%.
If you’re a team site owner, it’s a good idea to create a governance model – that is, a model to address your site’s policies, processes, roles, and responsibilities. A model like this will help you control how people use your site. For example, you might want to require check-out of files so that multiple people don’t try to edit a file at the same time. Or, you may want to allow only certain people to create subsites. This article gives an overview of ideas and best practices to think about when creating such a model.
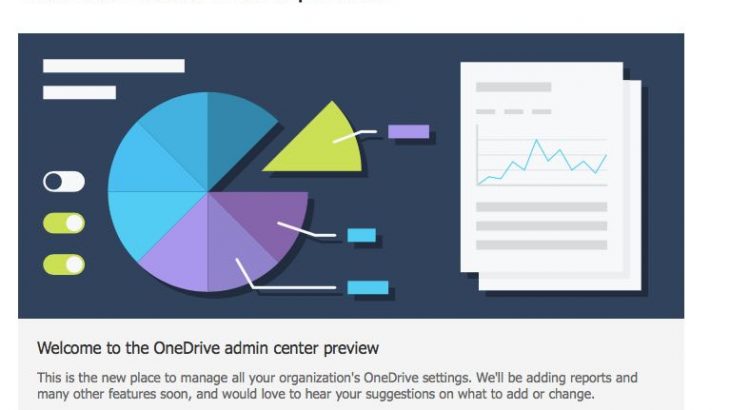
Over the past year, OneDrive has evolved at a rapid pace introducing new features for end users and IT, across sync, web, and mobile. As the number of users and usage continues to grow, our customers have asked for an easier way to administer their company OneDrive settings and policies. Today, we’re excited to announce the rollout of the OneDrive admin center preview to First Release customers and we want to hear your feedback.
Once deployed to your tenant, all tenant and SharePoint admins will have permissions to access the OneDrive admin center preview at https://admin.onedrive.com.
Key features by section include:
Please have a look at the preview and provide us your feedback and comments below. Our plan is to begin the generally available rollout later next month and subsequently add a link from the Office 365 admin center.
Build business apps, use on team sites & mobile devices where your teams work with PowerApps for #SharePoint.
https://blogs.office.com/2016/12/13/enroll-in-the-calendar-help-preview-and-let-cortana-schedule-your-meetings/
http://www.avepoint.com/community/strategy-blog/microsoft-teams-webianr-2016/
Jim Naroski covers recent enhancements to Office 365.
The transcript, with resources links, is at http://spo.ms/o365updateresources.
https://www.youtube.com/watch?v=oBD6IBYsxR4
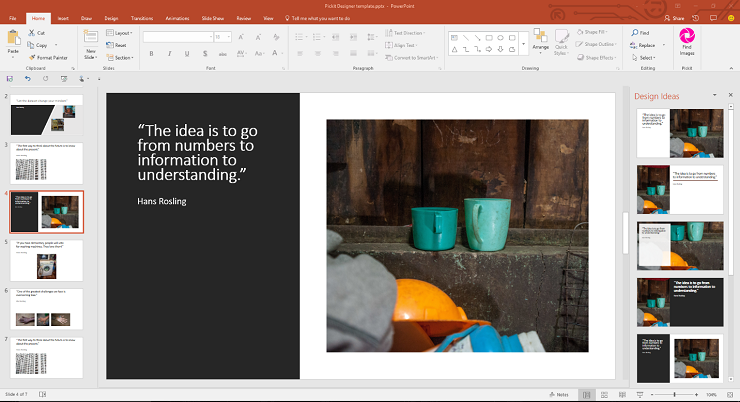
Now you can get the best in stock photos, icons & illustrations without ever leaving PowerPoint or Word. Download the PickIt Office add-in now: https://aka.ms/nx5irz
http://betterwith.office.com/pickit-microsoft-office-addin
https://www.youtube.com/watch?v=HiZo0LGLpNQ&feature=youtu.be